¶ 🔮 CMF Predict
With the Marvel Studios Series 2 (#71039), paper packaging has also made its way to the Collectible Minifigures. In addition to narrowing down minifigures by weight, a possible CMF can be determined based on the combination of the production code and serial number.
The data for the calculation comes from various sources; deviations and errors are possible. Therefore, it is not always guaranteed that the desired/determined figure is accurate.
If you want to see the process in action, you can watch Bricktum's video on YouTube here.
¶ Input via Code Scan
With the launch of Series 25 (#71045), capturing via code scan has become very popular. Currently, both versions are supported. Version 1 still requires additional input of missing data.
¶ Version Differences:
There are currently two versions distinguished.
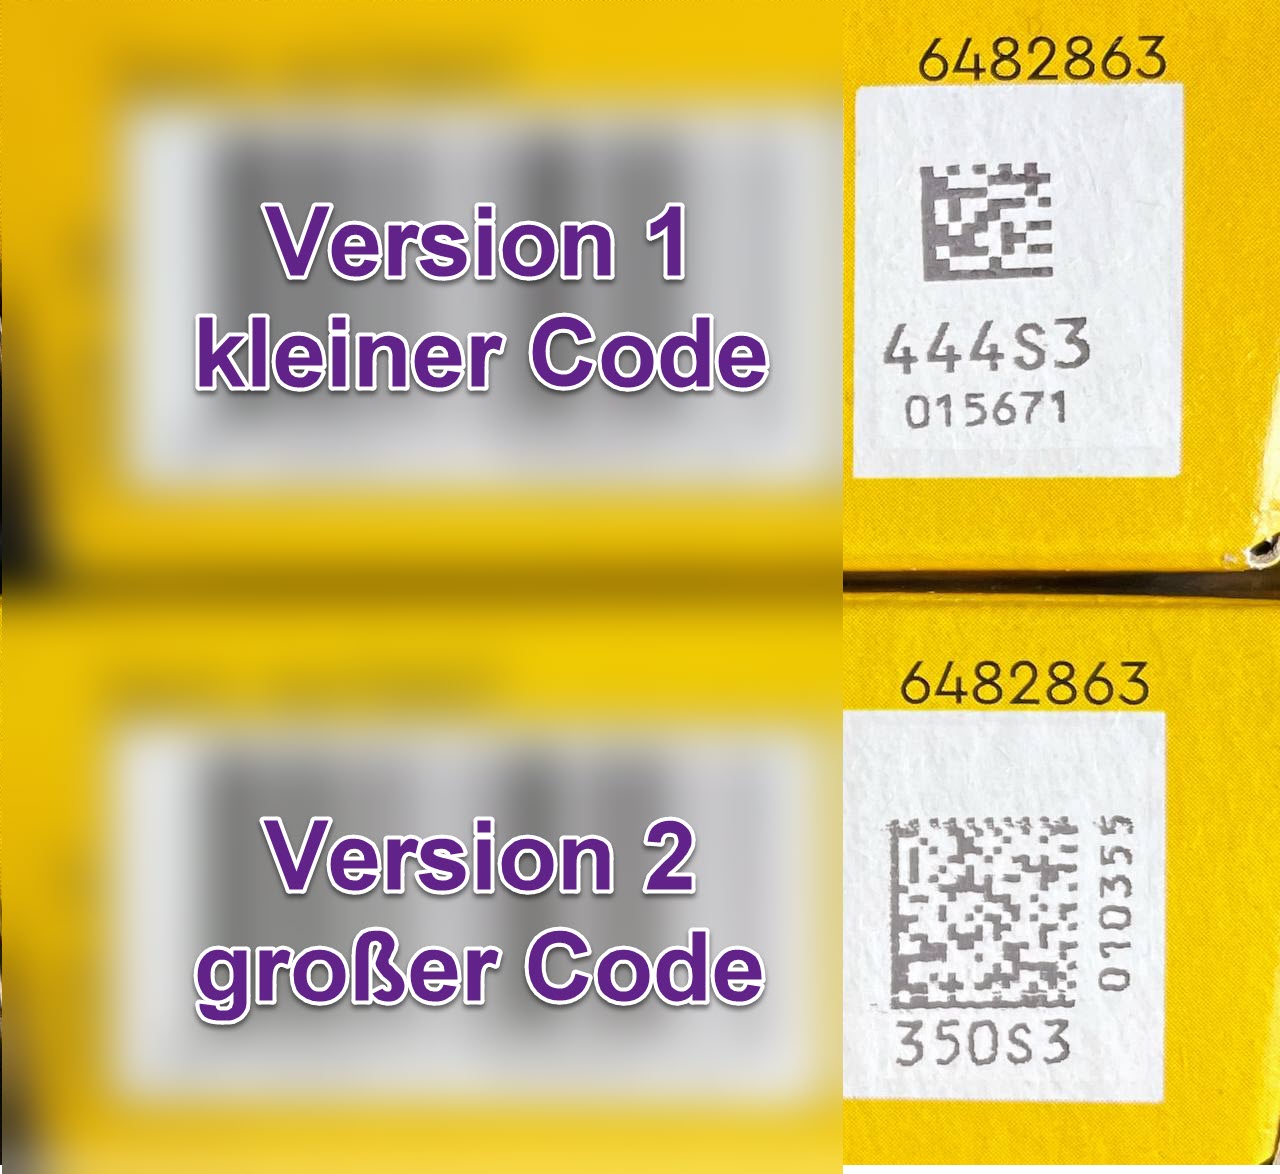
- Version 1: small code at the bottom of the package. If you scan this, you will still need to manually enter the production code. This information is not included in the code. Hits must be confirmed manually to improve the search together.
- Version 2: large code at the bottom of the package. If you scan this, all necessary data is captured at once, and the search starts automatically. These are automatically saved.
¶ Scan Modes
¶ Alternative via Scan App
If none of the scan modes work, there is also the option to solve it via a scan app.
¶ Input
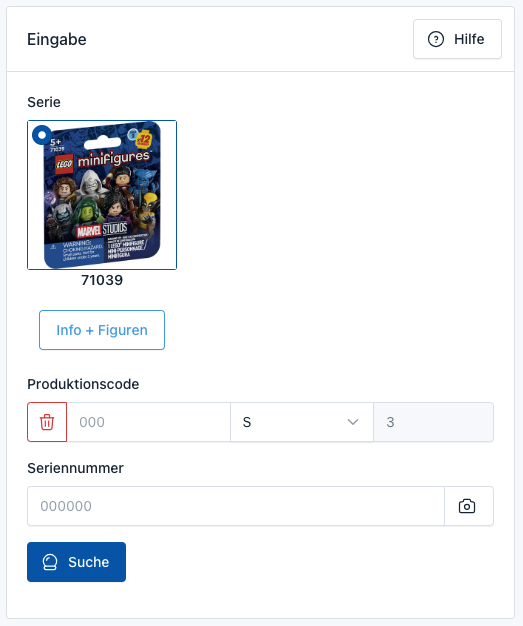
Info + Minifigures
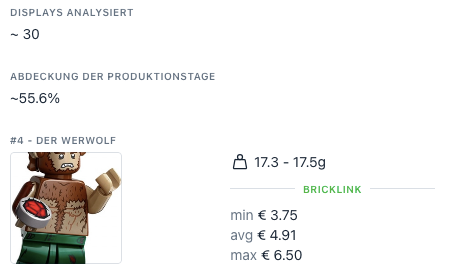
By clicking the Info + Minifigures button, you will see information about the current state of the series and the figures sorted by weight. Typically, the figures range within +/- 0.1g. However, higher deviations can occur. The weight refers to the unopened state, including packaging, etc.
The current daily Bricklink price (EU + VAT) is also displayed. If you want more information about the figure, simply click on the preview image.
Production day coverage is a fictitious value assumed by the system based on the maximum production days. Depending on the data situation, the value can rise or fall.
Series
Select the corresponding series here.
Production Code
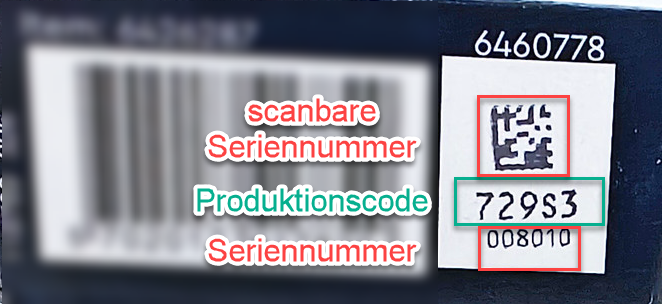
Each CMF has the production code printed at the bottom near the barcode (see photo). Enter the first 3 digits into the 1st field. Choose the corresponding letter. S is selected by default.
Serial Number
Finally, enter the serial number (see photo). This up to 6-digit number can also be scanned on mobile devices using the camera. Simply start the camera button at the end of the text field. The scanner takes over the serial number from the printed data matrix.
Note:
Depending on the phone and focus distance of the camera, it may unfortunately not be recognized as the imprint is very small.
TIP:
On PC/laptop, you can simply press Enter in this field, and the search will start.
Once you start the search, the data is analyzed and evaluated.
¶ Evaluation
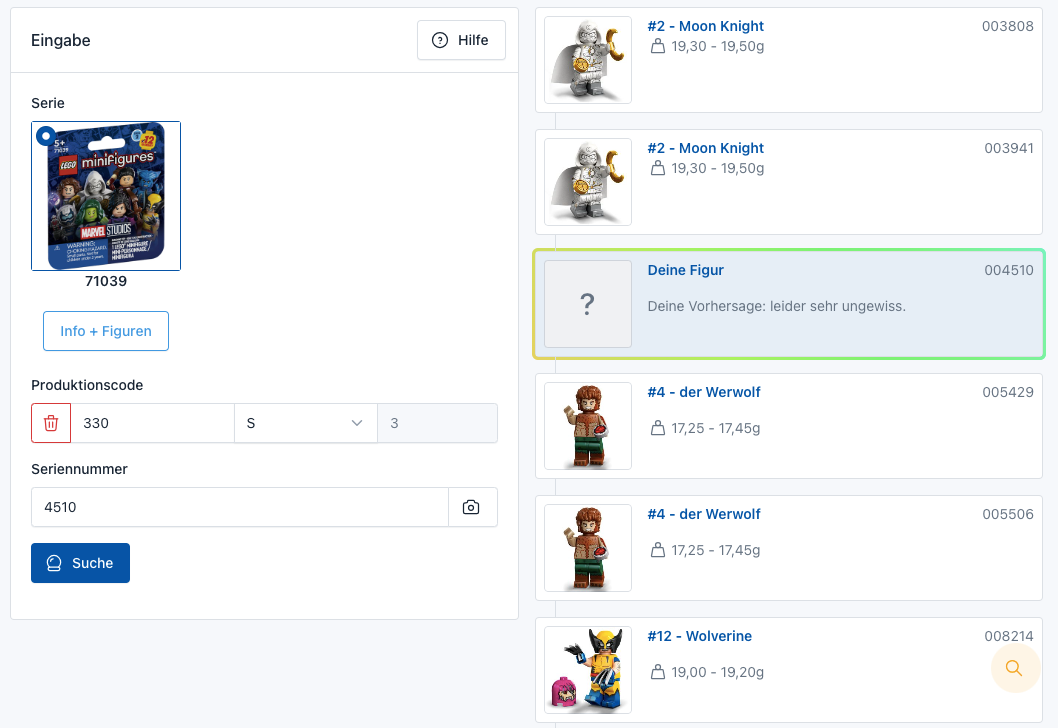
The evaluation shows the five figures before and after. The larger the dataset, the more accurate the determination of the figure. For those who own a precision scale, it also indicates the approximate weight of such a package with the figure.
Update: The first version of the prediction function is now active. Work is ongoing to get as accurate hits as possible.
There are several scenarios:
¶ Direct Hit
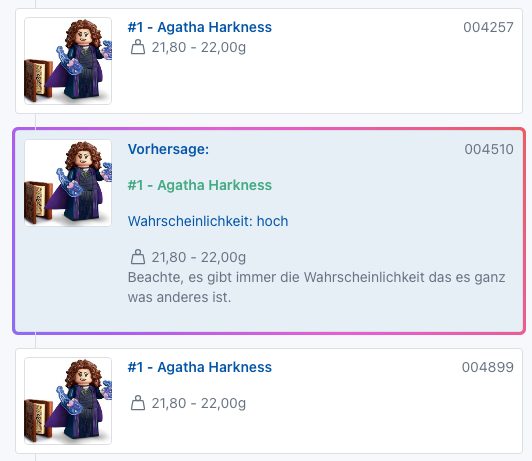
If suitable figures are found nearby, it is probably a direct hit. If you want to be sure, you should weigh the figure. The closer the hits, the higher the probability.
Note: Since there can be overlaps, especially in the transition area from figure batches, it is advisable to examine the figures before and after, or you can almost always narrow down the possibilities using a scale.
¶ Uncertain Hit
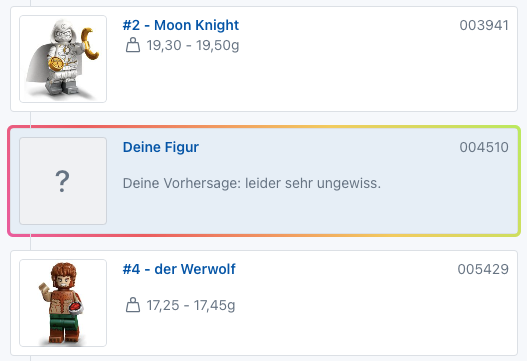
If there is no clear hit, for example, because different figures appear before and after, it is difficult to say what it could be. Here, you should take a close look at the figures before and after. The closer your number is to one of the two, the more likely it is.
Note: Since there can be overlaps, especially in the transition area from figure batches, it is advisable to examine the figures before and after, or you can almost always narrow down the possibilities using a scale.
¶ No Hit

If this message appears, unfortunately, no possible hit can be determined with the current data. Please try again later or double-check your input. In the figure info, you will find all weight information and the current status of evaluability.
Note: For weight determination, it is recommended to use a precision scale. A typical kitchen scale is not sufficient. I myself have a relatively inexpensive precision scale with counting function. For example, on Amazon, you can find many entry-level models.
For example: compact pocket scale or smaller tabletop scale with counting function
Both are fully sufficient for determining a CMF figure.
¶ Print Preview
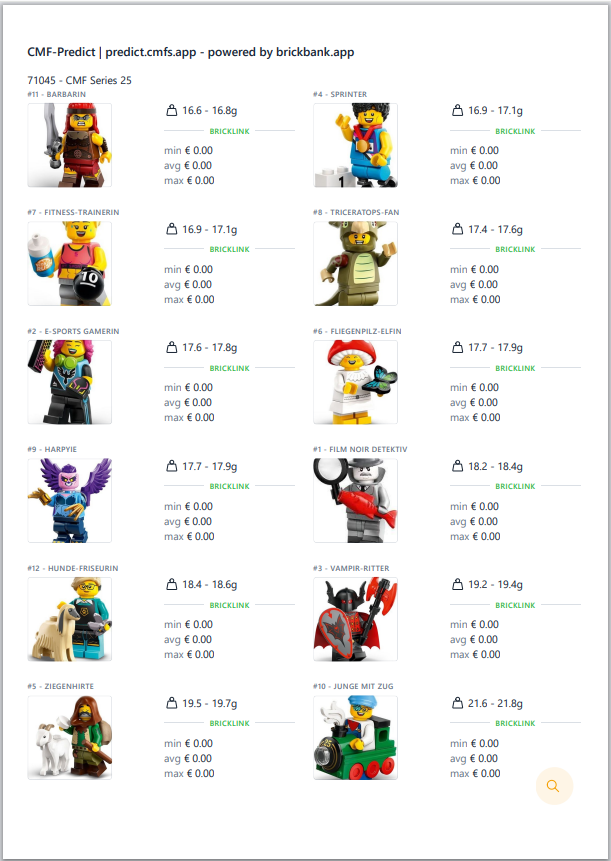
It is also possible to print out the overview table. The page is optimized to fit on an A4 sheet. Depending on the installed printer and settings, there may still be display problems.
¶ Tips and Known Issues
No Images
The most common problem that can occur is the absence of figure images.
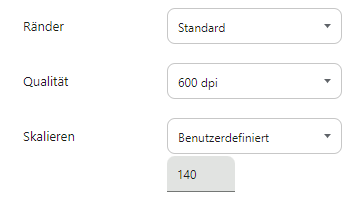
Solution: Activate the "Background Graphics" option in the print dialog under More Settings. You can also turn off the Header and Footer there if you don't want them printed.

Doesn't fit on one page
Depending on the printer and page margin settings, it may not fit on one page.
Solution: Set margins to Minimum. Often, this is enough to get all the figures on one page.
The display is too small / The figures are shown in 3 columns
Depending on the printer and page margin settings, the table may be very small.
Solution: Set the scaling to over 100%. From around 130-140%, it should be displayed in 2 columns. This option is usually found under More Settings in most browsers.
¶ Contribute Data
¶ Few Records
If you have individual records, you can submit them directly after the prediction.
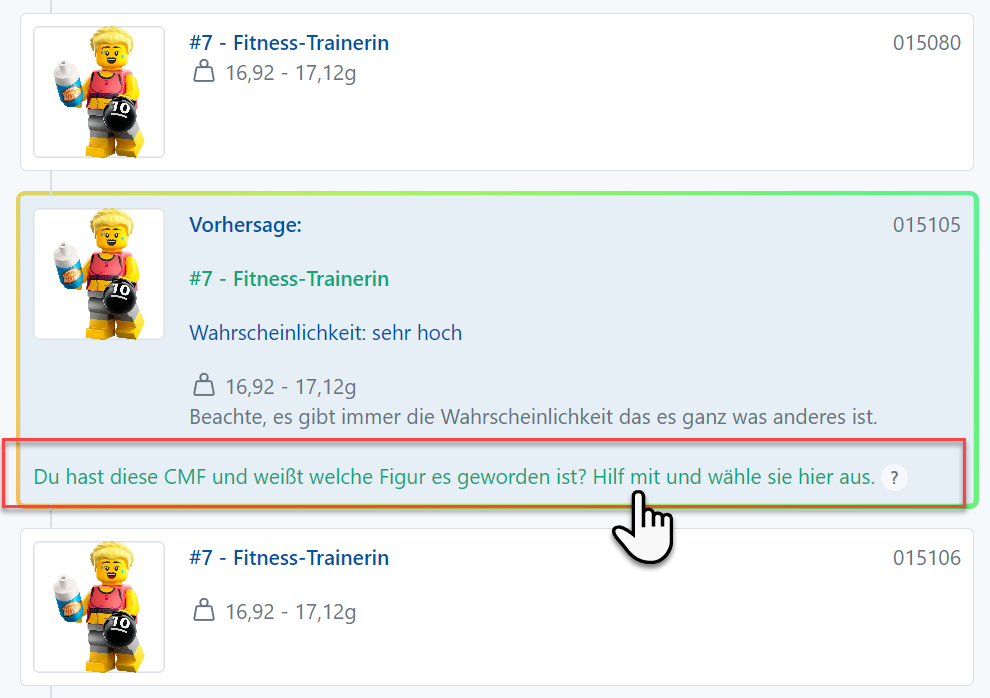
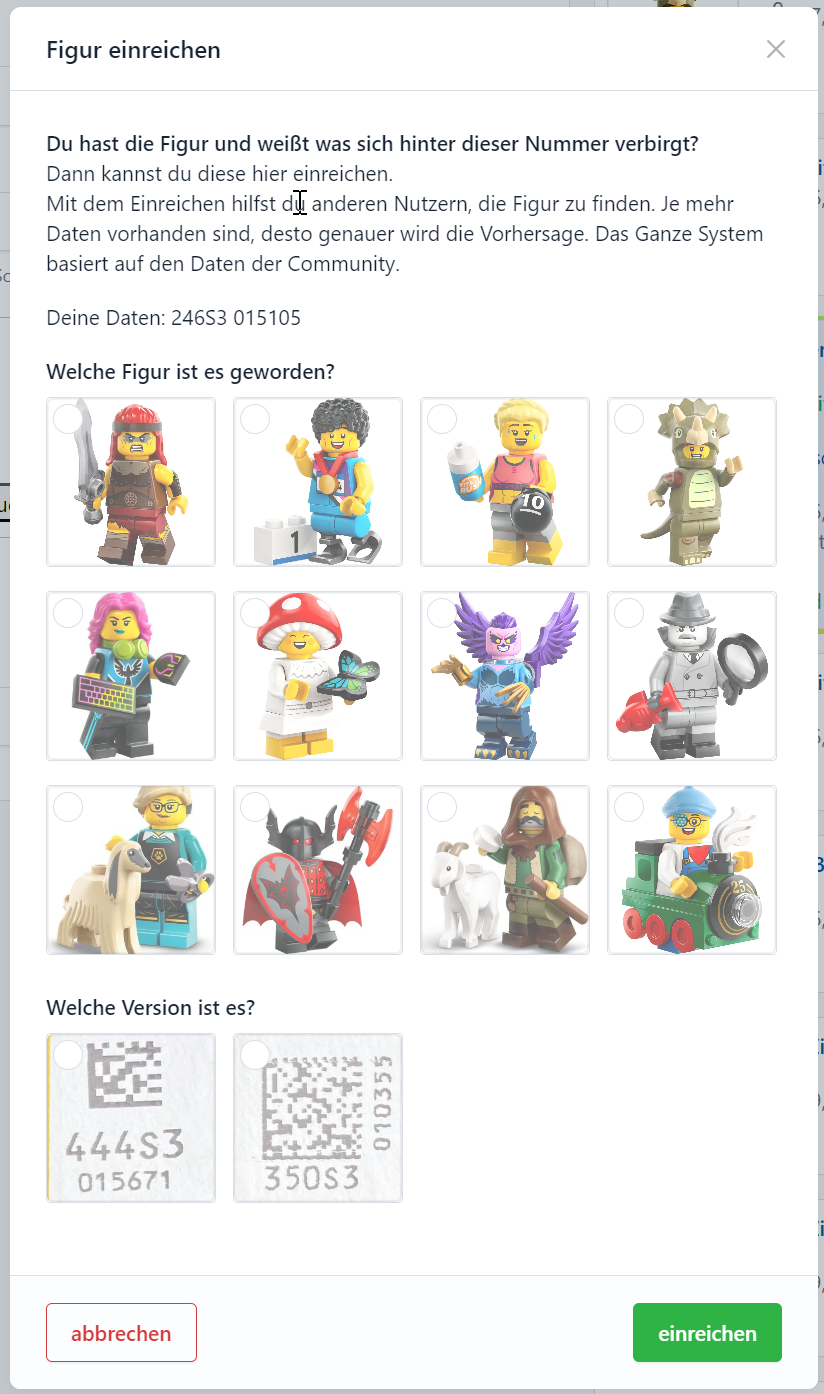
Then, you only have to select the correct CMF, set the version, and submit. The window will close automatically after a few seconds.
¶ Many Records
If you, for example, bought a whole display or opened individual figures, you can also contribute with your dataset and help. The data format is very simple; a CSV or Excel with 3 columns is sufficient. Optionally, you can also add the weight (with packaging) to improve weight information:
| Production Code | Serial Number | Figure | Weight (optional) |
|---|---|---|---|
| 330S3 | 4510 | 2 | 18.30 |
| 330S3 | 4511 | Moon Knight | 21.55 |
You can send me the data via PM on Telegram or by email to cmf📧brickbank.app.
Here is a ready-made template
- Google Sheet Simply create a copy under File -> Create a copy to use
- Excel File to download, fill out, and send
You can fill out this digitally or print it out and send it to me.
An easier option is still in progress!